“Can something as simple as a butter cookie truly capture the spirit of Christmas?”
That’s what I asked myself one snowy evening last December while watching my niece wrestle with a star-shaped cookie cutter that was nearly as big as her hand. She was three. Covered in flour. Beaming with joy. And it hit me—these cookies weren’t just sweet treats. They were memory-makers. And like any memory worth keeping, they deserved to be done right.
This guide isn’t just a list of steps—it’s the result of holiday-season kitchen experiments, recipe testing, and honest feedback from family who tell you the truth even when it stings. Whether you’re a seasoned baker or someone whose oven mostly stores pans, this recipe is simple, forgiving, and festive.
Why Christmas Butter Cookies Deserve a Place on Every Holiday Table
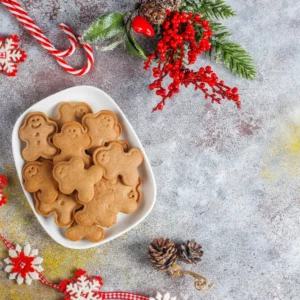
You can’t have Christmas without cookies, and you certainly can’t have a proper cookie platter without these buttery classics. Think of them as edible snowflakes—crispy-edged, soft-centred, and begging for a splash of festive colour. The best part? You likely have all the ingredients already.
According to British chef and food writer Felicity Cloake, “The best butter cookies are defined by simplicity. It’s not about extravagance—it’s about balance.” That’s exactly what we’re going for here.
Ingredients That Matter (and Why They Do)
The Essentials:
- 1 cup (227g) unsalted butter, softened Tip: Use European-style butter if available. It has higher fat content, which means richer flavour.
- 3/4 cup (150g) granulated sugar Tried with caster sugar and icing sugar too—granulated wins for texture.
- 2 cups (240g) all-purpose flour Don’t substitute with self-raising flour. You’ll end up with puffy scones, not cookies.
- 1/2 teaspoon vanilla extract Quality matters. I once made a batch with artificial vanilla. Never again.
- A pinch of salt Balances the sweetness and brings out the buttery notes.
Optional Toppings:
- Sprinkles
- Coloured sugar
- Royal icing
Don’t be afraid to get creative. I once used crushed candy canes. Kids loved them; dentists maybe not so much.
Step-by-Step: The Tested (and Kid-Approved) Method
1. Prepare the Butter
Let your butter sit out for 30–60 minutes. It should be soft enough to dent with a finger but not melting into a puddle.
Skip this and you’ll end up with dough that’s patchy and hard to mix.
2. Cream Butter and Sugar
Use a hand mixer or stand mixer to beat them together until light and fluffy. This takes 3–4 minutes on medium speed.
“Creaming introduces air, giving cookies that melt-in-your-mouth quality,” explains pastry chef James Morton.
3. Add Vanilla and Salt
Mix just until incorporated. The vanilla adds warmth; the salt keeps it from being one-dimensional.
4. Add Flour Slowly
Lower your mixer speed and add the flour in two batches. Stir just until no dry bits remain.
Overmixing activates gluten. That’s bread territory. Not what you want here.
5. Chill the Dough
Split the dough into two discs, wrap in cling film, and refrigerate for at least 30 minutes.
Tried baking without chilling once. The cookies spread into each other like a buttery avalanche.
6. Roll, Cut, and Shape
Roll out to 1/4-inch thickness. Cut with your favourite festive shapes—stars, trees, gingerbread men. Re-roll scraps once; twice if you must. Any more and the dough turns tough.
7. Bake at 350°F (175°C)
Place cookies on parchment-lined trays. Bake for 8–10 minutes until the edges just start to brown. You’re not making biscuits; don’t overdo it.
8. Cool and Decorate
Let cookies sit on the tray for 5 minutes, then move to a wire rack. Decorate once completely cool. Royal icing, anyone?
Common Mistakes and How to Dodge Them
1. Melting Instead of Softening Butter
Microwaving butter might save time, but it ruins structure. Softened = pliable, not puddled.
2. Overmixing the Dough
If it looks smooth and combined, stop. It’s not a workout.
3. Skipping the Chill
Cold dough holds its shape. Warm dough creates blobs. Your snowflake should not resemble a pancake.
Fun Variations to Try
- Almond Touch: Swap half the vanilla extract with almond extract.
- Lemon Zest Lift: Add 1 tsp of lemon zest to the dough.
- Chocolate Dipped: Once baked and cooled, dip halfway in melted chocolate and sprinkle with crushed pistachios.
Expert Tip: Bake in Batches
Don’t crowd the baking tray. Hot air needs room to circulate. I learned this the hard way when Santa-shaped cookies morphed into “melting elves.”
Storage and Gifting
These cookies last 1–2 weeks in an airtight container. Better yet, place them in a tin lined with wax paper and gift them. Homemade beats store-bought every time.
FAQs
Can I freeze the dough?
Absolutely. Wrap well and freeze for up to 3 months. Defrost overnight in the fridge before rolling.
Can I use cookie stamps?
Yes, just chill a bit longer so the pattern holds.
What’s the best icing?
Royal icing for clean lines; buttercream for soft, sweet swirls.
Final Thoughts
These Christmas butter cookies are more than a holiday tradition—they’re little tokens of joy, created with simple ingredients and a pinch of love. Whether you’re baking for your kids, your neighbours, or just yourself (absolutely valid), these cookies deliver.
So—what will your cookie cutter shape say about you this Christmas? 🎄
What’s Next?
If you bake a batch, share your experience in the comments below. What worked for you? Any secret family tweaks? Let’s make this recipe a living tradition.
Read Also: Meatless Gyros Using Roasted Chickpeas
Christmas Butter Cookies
Ingredients
For the Cookies:
- 1 cup 227g unsalted butter, softened
- 3/4 cup 150g granulated sugar
- 2 cups 240g all-purpose flour
- 1/2 teaspoon vanilla extract
- A pinch of salt
Optional Toppings:
- Colored sugar
- Sprinkles
- Royal icing
Instructions
Prepare the Butter:
- Allow butter to soften at room temperature until pliable but not melted.
Cream Butter and Sugar:
- In a large mixing bowl, beat butter and sugar together until light and fluffy.
Flavor the Dough:
- Add vanilla extract and a pinch of salt. Mix until combined.
Incorporate Flour:
- Gradually mix in the flour on low speed until the dough forms. Avoid overmixing.
Chill the Dough:
- Divide the dough in half, wrap in plastic wrap, and refrigerate for at least 30 minutes.
Shape the Cookies:
- Preheat the oven to 350°F (175°C).
- Roll out the chilled dough to 1/4-inch thickness on a floured surface. Use cookie cutters to create shapes.
Bake:
- Arrange cookies on a parchment-lined baking sheet.
- Bake for 8-10 minutes or until the edges are lightly golden.
Cool and Decorate:
- Let cookies cool for 5 minutes on the baking sheet, then transfer to a wire rack. Decorate as desired.
Notes
Storage Tips
- At Room Temperature: Store in an airtight container for up to 7 days.
- Freezing: Freeze undecorated cookies or dough for up to 1 month.