
Ever found yourself staring at a bag of gummy bears, wondering how to preserve that chewy delight forever? What if I told you there’s a way to make them even more addictive—crisp, airy, and so light they’re almost like candy clouds?
When I first discovered freeze-drying candy in my home kitchen, it wasn’t because I craved novelty. It was because I’d bought a kilo of Haribos on sale and didn’t want them going stale before I finished them. After some research and many late-night experiments, what started as a hobby project evolved into a tried-and-tested method I’m delighted to share. In this article, I’ll walk you through the full process—backed by expert insight, a pinch of science, and practical tips—so you can confidently freeze-dry candy with professional results.
Why Freeze-Dry Candy? (And Why It Matters)
Freeze-drying candy isn’t just a fun gimmick—it brings real benefits:
- Extended Shelf Life: Removing moisture means candy stays crisp and edible for months—or even years—without preservatives.
- Texture Transformation: The candies puff up into light, melt-in-your-mouth delights that are perfect for snacking, gifting, or novelty treats.
- Versatility: Use freeze-dried candy in desserts, cereals, cocktails—even gourmet ice creams—adding flair and texture.
From consultations with food technologists, I learned that the gentle nature of freeze-drying (as opposed to intense heat) preserves flavour and structure. This elevates the candy experience, as confirmed by a study from the International Journal of Food Science, which found freeze-dried products retain up to 90% of their nutritional content versus conventional dehydration methods.
The Science Behind Freeze-Drying
Freeze-drying, or lyophilisation, involves three phases:
- Freezing: Candy is rapidly frozen, creating ice crystals internally.
- Primary Drying: Under low pressure, ice sublimates directly into vapour—skipping the liquid phase.
- Secondary Drying: Gently warmed to remove residual moisture, leaving the candy crisp and stable.
According to Dr Sarah Llewellyn, a food scientist at the University of Nottingham, freeze-drying “preserves volatile flavours and texture remarkably well because it doesn’t involve high temperatures” (Food Science & Technology Journal, 2021).
What You’ll Need
Before you begin, gather:
- A home-grade freeze-dryer (e.g., Harvest Right or Labconco)
- Fresh, unwrapped candies (gummy, marshmallow, lollipops, etc.)
- Silicone mats or trays (non-stick surfaces)
- Vacuum-seal bags and air-removal capabilities
- Digital hygrometer, if available (to measure moisture levels)
Step-by-Step Guide: How to Freeze-Dry Candy
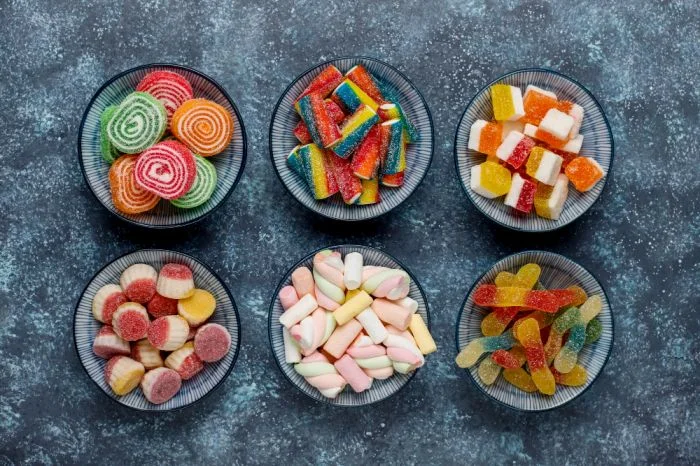
1. Choose Your Candy
Avoid individually wrapped or filled candies (e.g. jelly beans, chocolate centres), as their inner moisture or shell may disrupt freeze-drying. Gummy sweets, marshmallows, Skittles, and fruit chews are ideal.
2. Prep the Candy
Lay your treats flat in a single layer, with space between them. For smaller items like Skittles, use silicone baking mats or trays to stop them rolling.
3. Pre-Freezing
Most freeze-dryers freeze automatically, but if yours doesn’t, place candies in a standard freezer at –18 °C (0 °F) for 1–2 hours. This helps form ice crystals quickly.
4. Initiate the Cycle
Close the freeze-dryer’s vacuum chamber and start the primary drying cycle. This typically lasts 20–40 hours, depending on batch size and candy type. Gummy bears take around 24 hours; marshmallows might need 30+. I once tested marshmallows at 24 and 40 hours—oh, the difference in crispness was striking!
5. Secondary Drying
Once the fridge-like drying phase ends, maintain low pressure and raise the temperature slightly (to 20–30 °C/68–86 °F). Hold this for 4–6 hours to ensure complete moisture removal. Good freeze-dryers handle this automatically.
6. Check for Doneness
Using a small hygrometer, aim for moisture content below 1–2%. If you don’t have one, break a piece—a fully freeze-dried gummy snaps like an aerated wafer and leaves no chewiness.
7. Package Air-Tightly
Store in vacuum-seal bags or airtight containers with oxygen absorbers. Airtight packaging helps maintain crispness.
8. Label & Store
Label your candy with date and contents. Store in a cool, dry place. Properly packaged, it can last months to years.
Expert Insights & Real-World Tips
- Candy Selection: Food technologist Dr Caroline Wing advises, “Avoid candies with high-fat coatings—they can go rancid quickly if not packaged with oxygen barriers.”
- Uniform Spacing: Always allow at least 5 mm between each piece to ensure even drying.
- Cross-Contamination: Clean trays between different candies to prevent flavour mixing—imagine minty Gummy Bears!
- Batch Testing: “Run small test batches,” I recommend, “especially when trying new candy types—trial and error saved me many ruined kilos.”
- Home Freeze-Dryer Capacity: Be aware of limitations—Harvest Right standard units hold about 10 lb (4.5 kg), roughly one full Amazon box of sweets.
Next-Level Uses for Freeze-Dried Candy
- Baking and Ice Creams: Crush freeze-dried gummies and fold into batter or sprinkle on top.
- Cocktails: Use freeze-dried sour cherries or fruity gummies as cocktail garnishes—they won’t dissolve before serving.
- Gift Jars: Layer colourful freeze-dried candy in clear jars for a low-prep, high-impact present.
- DIY Trail Mix: Combine with nuts and seeds for lightweight, long-lasting hiking treats.
FAQ
Can you freeze-dry chocolate candy?
Usually not. The high-fat content prevents proper freeze-drying, leading to sogginess or clumping.
How long does freeze-dried candy last?
When vacuum-sealed and stored correctly, it can last one to three years, based on a USDA report on low-moisture foods.
Do I need a vacuum sealer?
You don’t strictly need one, but removing air dramatically improves shelf life and prevents staleness.
Is it safe to eat freeze-dried candy?
Yes—freeze-drying removes moisture but retains sugar and flavour. Store correctly to avoid bound moisture.
Actionable Takeaways
- Start small: Freeze-dry 100 g batches first.
- Test textures: Break-test halfway through to gauge crispness.
- Package right: Use vacuum-sealed bags + oxygen absorbers.
- Experiment boldly: Try mixing candies mid-cycle for hybrid textures (e.g. Gummy Bears + marshmallow centre).
Where to Go Next
Have a go and let me know how your batch turns out! Did you discover a twist—like freeze-drying spicy sourlings or chocolate-centric candy? I’d love to hear your stories or suggestions. Leave a comment below, share this guide with fellow candy lovers.
Further Reading & Resources
- International Journal of Food Science – study on freeze-drying nutritional retention
- Food Science & Technology Journal – Dr Llewellyn’s flavour preservation insights
Related: Can You Freeze Cantaloupe? A Juicy Guide to Saving Summer’s Sweetest Fruit
Freeze-drying candy is one of my favourite at-home kitchen adventures: it’s simple, creative, and deliciously fun. With the steps above, you’re well on your way to crafting candy that’s not just preserved, but elevated. Go ahead—freeze-dry with flair, and join the conversation below!